Control Valve Maintenance Checklist: Increase Lifespan and Efficiency
In the intricate dance of an industrial process, the control valve is a lead dancer, gracefully pirouetting to the rhythm of the process controller. It dictates the flow of fluids and gases, ensuring everything from the temperature in a reactor to the pressure in a pipeline remains within its designated safe and efficient operating window. For any instrumentation engineer, the reliability of these final control elements is paramount. A failing control valve can lead to production losses, quality issues, and in the worst-case scenario, catastrophic safety incidents.
This is where a robust control valve maintenance program comes into play. It’s not just about fixing what’s broken; it’s about creating a proactive ecosystem of care that extends the life of your valves, boosts their efficiency, and ultimately, safeguards your entire process. This comprehensive guide, tailored for instrumentation and control engineers, will walk you through a detailed maintenance checklist, explore efficiency-boosting strategies, and provide insights to keep your control valves in peak condition.
The Unsung Hero: Understanding Your Control Valve
Before we dive into the nitty-gritty of maintenance, let’s take a moment to appreciate the complexity of a control valve. It’s more than just a simple open-and-close device. It’s a sophisticated assembly of a valve body, an actuator, and a positioner, each with its own set of components that require attention.
Block Diagram: Anatomy of a Typical Control Valve System

This diagram illustrates how a control signal from the controller (like a DCS or a PLC) is received by the positioner. The positioner, in turn, precisely controls the actuator (which can be pneumatic, electric, or hydraulic) to move the valve’s trim (the internal components that modulate the flow). This intricate interplay ensures accurate and responsive control.
The Ultimate Control Valve Maintenance Checklist
A systematic approach is key to effective maintenance. This checklist is designed to be comprehensive, covering various aspects of the control valve assembly. It’s broken down into routine, periodic, and annual checks, but the frequency should always be adapted to your specific process conditions, the criticality of the valve, and the manufacturer’s recommendations.
Table: Comprehensive Control Valve Maintenance Checklist
| Frequency | Component | Maintenance Task | Why It Matters |
|---|---|---|---|
| Daily/Weekly | General Assembly | Visual Inspection for leaks (body, flanges, packing), physical damage, loose bolts, and unusual noises or vibrations. | Early detection of issues prevents minor problems from escalating into major failures. |
| Air Set/Regulator | Drain moisture and impurities from the air filter regulator set. | Ensures clean, dry air supply to pneumatic actuators, preventing corrosion and sluggish operation. | |
| Monthly | Positioner | Check for and clean any external debris. Verify gauges are reading correctly. | A clean and functioning positioner is crucial for accurate valve positioning. |
| Actuator | Check for air leaks from pneumatic tubing and fittings. | Air leaks lead to wasted energy and can affect the actuator’s ability to position the valve correctly. | |
| Quarterly | Valve Packing | Inspect for any signs of leakage. If minor, gently tighten the packing flange bolts. | Packing leaks are a common source of fugitive emissions and can lead to product loss and safety hazards. |
| Calibration | For critical valves, perform a basic stroke check to ensure full travel (0% to 100%). | Verifies that the valve can still achieve its full range of control. | |
| Annually | Full System Inspection (During Shutdown) | Disassemble the valve for internal inspection. | Allows for a thorough examination of all internal components that are not visible during operation. |
| Trim (Plug, Seat, Cage) | Inspect for wear, erosion, corrosion, and cavitation damage. Check for proper seating and shut-off. | The trim is the heart of the control valve; its condition directly impacts flow control and shut-off capability. | |
| Body and Bonnet | Clean and inspect for erosion, corrosion, and any signs of cracking. | The pressure-retaining boundary of the valve must be sound to ensure safety. | |
| Packing and Gaskets | Replace all soft goods like packing, gaskets, and O-rings. | These components degrade over time and are a primary source of leaks. | |
| Actuator | Inspect the diaphragm or piston seals for wear and tear. Lubricate as per manufacturer’s guidelines. | A healthy actuator ensures the necessary force is available to move the valve against process pressures. | |
| Positioner and I/P Transducer | Perform a full calibration. Check for linearity, hysteresis, and deadband. | A full calibration ensures the valve responds accurately and repeatably to the control signal. | |
| Accessories | Inspect and test limit switches, solenoid valves, and volume boosters. | All accessories must function correctly for the control valve to operate as intended within the larger control loop. |
Beyond the Checklist: Strategies for Increasing Lifespan and Efficiency
While a checklist is an excellent tool for systematic maintenance, true optimization comes from a deeper understanding of your control valves and their operational context. Here are some strategies to elevate your maintenance program and extract maximum performance and longevity from your assets.
1. The Power of Proactive and Predictive Maintenance
Moving from a reactive (“fix it when it breaks”) to a proactive maintenance culture is a game-changer.
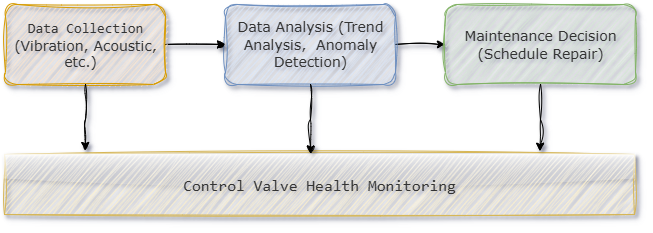
- Vibration Analysis: Regular vibration monitoring of the valve and actuator can detect early signs of bearing wear, misalignment, or cavitation.
- Acoustic Analysis: Specialized acoustic sensors can “listen” for internal leaks in a closed valve, a critical check for ensuring tight shut-off.
- Infrared Thermography: Thermal imaging can identify hot spots on the valve body, which could indicate internal erosion or friction. It can also detect leaks in steam service.
- Valve Signature Analysis: Modern smart positioners can perform diagnostic tests, generating a “signature” of the valve’s performance (friction, spring rate, etc.). Comparing signatures over time can reveal developing problems before they impact the process.
Block Diagram: Predictive Maintenance Workflow
2. Tackling the Common Enemies of Control Valves
Understanding the common failure modes allows you to tailor your maintenance efforts to prevent them.
- Stiction (Static Friction): This is when the valve gets “stuck” and requires extra force to start moving, leading to jerky and imprecise control.
- Solution: Proper packing lubrication and not over-tightening the packing are crucial. Using high-performance packing materials can also significantly reduce stiction. Regular cycling of the valve can also help.
- Cavitation and Flashing: These are destructive phenomena that occur when the pressure of the liquid passing through the valve drops below its vapor pressure. The collapse of vapor bubbles (cavitation) or the continued existence of vapor downstream (flashing) can cause severe erosion and noise.
- Solution: Using anti-cavitation trim designs, managing the pressure drop across the valve, and ensuring proper valve sizing are key preventive measures.
- Erosion: This is the wearing away of material due to the abrasive action of the process fluid, especially if it contains solid particles.
- Solution: Selecting valves with hardened trim materials, using angled valve bodies to minimize direct impingement, and installing strainers upstream can mitigate erosion.
- Corrosion: Chemical attack on the valve materials can lead to thinning of the valve body and trim, ultimately compromising its integrity.
- Solution: Careful material selection based on the process fluid’s chemical properties, temperature, and concentration is the primary defense against corrosion.
3. The Importance of Proper Sizing and Selection
An oversized control valve is a common and costly mistake. It will operate mostly in the lower end of its travel range, leading to poor control, increased wear on the seat and plug, and a higher likelihood of “hunting” (oscillating around the setpoint).
- Best Practice: Always perform detailed sizing calculations based on the actual process conditions (flow rates, pressures, temperatures). Don’t just replace a valve with the same size without re-evaluating the application. A correctly sized valve will operate in its optimal control range (typically between 20% and 80% of its travel).
4. Lubrication: The Lifeblood of a Control Valve
Proper lubrication of the actuator stem, packing, and other moving parts is a simple yet highly effective maintenance task. It reduces friction, prevents corrosion, and ensures smooth and responsive operation. Always use the lubricant specified by the manufacturer, as incompatible lubricants can damage seals and other components.
Humanizing Your Maintenance Approach: It’s All About the Team
Technology and checklists are powerful, but the human element is what makes a maintenance program truly successful.
- Empower Your Technicians: Provide them with the right tools, training, and documentation. Encourage them to report observations and suggestions for improvement.
- Foster Collaboration: Bridge the gap between instrumentation, maintenance, and operations. Operations personnel are the first to notice changes in process behavior that could indicate a valve problem.
- Documentation is Your Friend: Maintain a detailed history for each control valve, including installation dates, maintenance activities, calibration records, and any observed issues. This data is invaluable for troubleshooting, identifying recurring problems, and optimizing your maintenance strategy.
The Payoff: A More Reliable and Efficient Plant
Investing in a comprehensive control valve maintenance program yields significant returns. You’ll experience:
- Increased Uptime: Fewer unplanned shutdowns due to valve failures.
- Improved Product Quality: Consistent and accurate control leads to a more stable process and higher quality output.
- Enhanced Safety: Reduced risk of leaks, fugitive emissions, and other safety incidents.
- Lower Operating Costs: Reduced energy consumption from leaking valves and optimized process efficiency.
- Extended Asset Life: Proactive care maximizes the return on your investment in these critical assets.
Your control valves are the silent workhorses of your plant. By giving them the attention and care they deserve, you are not just maintaining equipment; you are investing in the long-term health, efficiency, and safety of your entire operation. So, embrace this checklist, adopt these strategies, and empower your team to become champions of control valve reliability. The rewards will be felt on the plant floor and on your bottom line.
Control Valve Maintenance & Inspection Checklist
This checklist provides a structured approach to inspecting and maintaining control valves to ensure their reliability, performance, and longevity. Adapt the frequencies based on the valve’s criticality, service conditions (e.g., severe service, corrosive fluids), and manufacturer recommendations.
Valve Identification:
- Valve Tag No.: ____________________
- Service/Location: ____________________
- Date of Inspection: ____________________
- Inspected By: ____________________
Part 1: Routine In-Service Inspections (While Plant is Operational)
These checks should be part of regular operator or technician rounds.
| Frequency | Component / Area | Specific Check / Task | Status (OK/Needs Attention) | Comments / Action Taken |
|---|---|---|---|---|
| Daily / Per Shift | General Assembly | Listen for any unusual noises (e.g., humming, whistling, chattering) or high vibrations. | ||
| General Assembly | Visually inspect for any obvious physical damage, loose bolts, or external corrosion. | |||
| Weekly | Valve Body & Connections | Check for any leaks from the valve body, bonnet, or flange gaskets. | ||
| Packing | Visually inspect the packing area (where the stem exits the bonnet) for any process fluid leaks. | |||
| Pneumatic Tubing & Fittings | Check for audible air leaks from tubing connected to the actuator and positioner. | |||
| Air Filter Regulator | Check the air pressure gauge to ensure it’s at the correct set pressure. | |||
| Air Filter Regulator | Drain any accumulated moisture or condensate from the filter bowl. | |||
| Monthly | Positioner | Check that the positioner feedback linkage is secure and moving freely. | ||
| Positioner | Ensure positioner gauges (if present) are providing steady and logical readings. | |||
| Stroke Operation | If possible and safe, manually stroke the valve (or observe its automatic movement) to ensure it is not sticking. |
Part 2: Minor Preventive Maintenance (Quarterly / Semi-Annually)
These checks are more in-depth and may require the valve to be briefly bypassed, depending on the task.
| Frequency | Component / Area | Specific Check / Task | Status (OK/Needs Attention) | Comments / Action Taken |
|---|---|---|---|---|
| Quarterly | Packing Follower | If a minor packing leak was observed, perform a gentle, even tightening of the packing flange nuts (e.g., one-quarter turn). Caution: Do not over-tighten. | ||
| Lubricator | If the valve has a lubricator for the packing, grease it according to manufacturer specifications. | |||
| Actuator Stem | Clean and lubricate the actuator stem (yoke threads) to ensure smooth movement. | |||
| Calibration Check | Perform a basic 5-point calibration check (0%, 25%, 50%, 75%, 100%) to verify valve travel and positioner accuracy. | |||
| Semi-Annually | I/P Transducer | Check and clean the I/P transducer orifice if performance seems sluggish. | ||
| Bolting | Check the tightness of all accessible external bolts (flanges, actuator mounting, etc.). |
Part 3: Major Maintenance & Overhaul (Annually / During Shutdown)
This comprehensive inspection requires removing the valve from the line.
| Component | Specific Check / Task | Done (✔) | Findings / Corrective Action |
|---|---|---|---|
| Disassembly | Isolate, de-pressure, drain, and remove the valve from the line. | ||
| Disassemble the actuator from the valve body. | |||
| Disassemble the valve bonnet and remove internal components (trim). | |||
| Valve Body | Thoroughly clean the interior and exterior of the valve body and bonnet. | ||
| Inspect the valve body internally for signs of erosion, corrosion, pitting, or cracking. | |||
| Check flange facing for damage or warping. | |||
| Valve Trim (Plug, Seat, Stem, Cage) | Inspect the plug (or disk) and seat sealing surfaces for wear, pitting, galling, or wire drawing. | ||
| Check for straightness of the valve stem; ensure it’s not bent or scored. | |||
| Inspect the cage (if present) for signs of erosion or cavitation damage. | |||
| Action: Replace or re-lap/machine trim components as necessary. | |||
| Soft Goods | Replace all soft goods as a standard practice. This includes: | ||
| • Valve Packing | New packing material: ____________ | ||
| • Body/Bonnet Gaskets | New gasket material: ____________ | ||
| • Actuator Diaphragm/Seals | |||
| Actuator | Disassemble the actuator. | ||
| Inspect the diaphragm (for pneumatic actuators) for tears, holes, or brittleness. | |||
| Inspect piston seals/O-rings for wear or damage. | |||
| Check the actuator spring for cracks or signs of corrosion. | |||
| Clean all actuator components. | |||
| Lubricate all moving parts as per manufacturer specifications. | |||
| Positioner & Accessories | Remove the positioner for bench calibration. | ||
| Perform a full 3-point, 5-point, or 9-point calibration test. | Record As-Found/As-Left data. | ||
| Check linearity, hysteresis, and deadband against acceptable limits. | |||
| Inspect and test accessories like solenoid valves, limit switches, and volume boosters. | |||
| Reassembly & Testing | Reassemble the entire control valve assembly. | ||
| Torque all bolting to the manufacturer’s specified values. | |||
| Perform a bench set test to verify actuator stroke and spring settings. | |||
| Perform a seat leakage test (e.g., using air or water) to verify shut-off capability meets its specified class (e.g., Class IV, V, VI). | |||
| Final Documentation | Update the valve’s maintenance record with all findings and actions taken. | ||
| Attach As-Left calibration reports. | |||
| Tag the valve as “Overhauled” or “Ready for Service.” |